Imagine holding a dragon in your hands, not a toy, not a sculpture bought from a store, but a creature you brought to life layer by layer. With today’s 3D printing technology, this fantasy isn’t just possible, it’s something you can create at home.
3D printed dragons have become a favorite among makers for their intricate detail and visual impact. But printing a dragon isn’t just about downloading a model and hitting “print.” It’s a multi-step process that blends digital craftsmanship with physical precision.
In this guide, we’ll walk you through each phase—from finding or designing your dragon model to the finishing touches after printing. Whether you’re a hobbyist with a printer on your desk or someone exploring 3d printing online services for your first print, this tutorial will equip you with everything you need to make your own 3D printed dragon.
Step 1: Find or Design a 3D Dragon Model
The first step in making your own 3D printed dragon is getting a model, either by finding an existing design or creating one from scratch. Fortunately, there is a wealth of resources online for both options, depending on your skill level, artistic vision, and printing goals.
Before diving into specific platforms or software, it helps to start with a focused search. Typing terms like:
- dragon
- dragon with wings
- sword dragon
- articulated dragon
They can yield a wide variety of results, from stylized fantasy creatures to ultra-detailed collectibles. You’ll often find community tags and categories that help narrow down your choices based on size, style, or articulation.
Option 1: Download a Ready-Made Model
If you’re just starting out or want to print a tried-and-tested dragon design, browsing 3D model libraries is a great place to begin. Many talented creators share dragon models for free or for a small fee. Here are some popular platforms:
- Thingiverse – Home to thousands of free models, including articulated dragons that print in one piece with movable joints.
- MyMiniFactory – Offers both free and premium models, often curated with higher print quality in mind.
- Cults3D – Known for stylized and artistic models, including fantasy creatures like dragons.
- Printables (by Prusa) – Features community-tested files with print settings and user feedback.
- CGTrader – Ideal for high-poly models, often used by artists and professionals.
When choosing a model, consider your printer’s capabilities. Highly detailed or large dragons may require a resin printer or FDM printer with a large build volume. Check whether the file includes support structures, articulated joints, or multi-part assembly instructions.

Image: Flying 3d dragon model
Option 2: Design Your Own Dragon
If you’re artistically inclined or have a very specific idea in mind, you can design a custom dragon using 3D modeling software. This route gives you full control over the pose, texture, articulation, and scale of the creature. Depending on your design goals, here are some popular tools:
- Blender – Powerful and free, Blender is ideal for sculpting organic shapes like scales, wings, and claws.
- ZBrush – Used by professionals in the gaming and film industries, ZBrush is ideal for ultra-detailed sculpting.
- Tinkercad – A beginner-friendly browser-based tool; while limited in sculpting features, it’s great for experimenting.
- Fusion 360 – More engineering-oriented, but useful if you’re creating functional joints or mechanical parts.
Designing a dragon from scratch is time-intensive and requires a solid understanding of 3D modeling principles like mesh topology, supports, and printability. However, if you enjoy digital sculpting, this can be one of the most rewarding parts of the process.
Step 2: Prepare the 3D Model File
Once you’ve found or created your dragon model, the next step is to ensure it’s properly formatted and optimized for 3D printing. Most slicer software accepts models in either STL or OBJ format, with STL being the most widely used in the 3D printing world due to its simplicity and compatibility.
Exporting the Model
If you downloaded your model from a platform like Thingiverse or MyMiniFactory, chances are it already comes in STL format. If you designed it yourself, you’ll need to export it from your CAD software. Most programs, including Blender, Fusion 360, and Tinkercad, have built-in export functions that allow you to save your file as an STL or OBJ.
Before exporting, double-check the model’s scale and units; some software may default to millimeters, others to inches. An improperly scaled dragon model might turn out either tiny or too large for your printer’s build volume.
Inspecting and Repairing the Model
Even the most impressive dragon design can fail to print correctly if the model has structural issues. Common problems include:
- Non-manifold geometry (holes or intersecting faces)
- Inverted normals (surfaces facing inward instead of outward)
- Thin walls that are too delicate to print
Use mesh-checking tools like:
- Meshmixer (Autodesk) – Free and great for inspecting and fixing non-manifold issues.
- Microsoft 3D Builder – Offers one-click repair for simple models.
- Netfabb (Basic version) – Used for automatic repairs and wall thickness checks.
These tools help ensure your model is “watertight” – a necessary condition for successful slicing and printing.
Optimize for Printing
If your dragon has intricate overhangs, tight joints, or multiple parts, it’s worth doing a test orientation or splitting the model into sections before slicing. You can also hollow out large resin models to save material and reduce curing time later.
By the end of this step, you should have a clean, printable 3D model file – properly scaled, optimized, and ready for slicing.

Image: 3D Printed dragon
Step 3: Slice the Model Using Slicing Software
Once your dragon model is cleaned and ready, the next critical step is slicing, converting your 3D model into a set of precise instructions your printer can understand. This is done using slicing software, which translates your STL or OBJ file into G-code: a layer-by-layer blueprint that tells the printer exactly where to move, how much material to extrude, and at what speed.
Choosing a Slicer
The slicing software you use will depend on your printer and printing method. Here are some widely used and trusted options:
- Cura – Free and open-source, Cura is widely compatible with FDM printers and offers customizable profiles for popular filaments.
- PrusaSlicer – Developed for Prusa printers but also works well with others; ideal for both FDM and resin workflows.
- Bambu Studio – A powerful slicer with intelligent features, especially when using Bambu Lab’s multi-color systems.
- Lychee Slicer – Commonly used for SLA/DLP (resin) printers, featuring advanced support placement and auto-orientation.
Each slicer has different strengths, but most allow you to preview the print, estimate time and material use, and adjust numerous parameters.
Key Slicing Settings for 3D Dragons
Your dragon model may feature fine scales, long tails, extended wings, or complex joints, all of which require careful configuration. Here are the most critical slicing settings to pay attention to:
- Layer Height – Affects detail and print time. Use 0.1–0.15 mm for high detail; 0.2 mm for faster prints.
- Infill Density – Dragons with thick bodies or large bases can be printed with 10–20% infill. For hollow or display-only models, even less may suffice.
- Supports – Essential for wings, horns, and overhanging claws. Customize placement to avoid scarring detailed areas.
- Build Plate Adhesion – Use skirts, brims, or rafts to prevent warping and improve bed adhesion, especially for tall or thin-legged models.
- Print Orientation – Adjust the angle of your model to minimize support needs and enhance detail on visible surfaces.
Most slicers offer preview modes to simulate the print process. Use this feature to verify layer transitions, support placement, and critical overhangs before exporting your G-code.
Advanced Tips
If you’re printing a large dragon, you can slice the model into parts and print them separately. Some slicers, like Meshmixer or PrusaSlicer, allow you to cut and align parts with dowel pin holes for easy post-assembly.
If you’re planning on painting the dragon, consider enabling iron-on top layers (in Cura) for smoother surfaces, or fine-tuning wall count and top/bottom layers to reduce print lines.

Image: 3d-printed dragon with wings
Step4: Choose Your 3D Printing Method and Material
Now that your dragon model has been sliced and is ready to print, it’s time to select the printing method and material that will bring it to life. The method you choose will influence everything—from surface finish and structural strength to 3d printing cost and level of detail.
FDM vs. Resin Printing: Which Should You Use?
There are two main types of desktop 3D printing: Fused Deposition Modeling (FDM) and resin-based printing (SLA/DLP). Each has distinct advantages depending on the type of dragon you’re printing.
- FDM (Fused Deposition Modeling)
Best for: large dragons, articulated models, functional parts
This is the most common and affordable method. FDM printers work by extruding melted filament (typically plastic) through a heated nozzle, layer by layer. It’s especially well-suited for: - Articulated dragons (models with moving segments)
- Large prints with moderate detail
- Durable and flexible prints
- Resin Printing (SLA or DLP)
Best for: small to medium dragons with intricate details
Resin printers cure liquid photopolymer resin using UV light. They can capture extremely fine features like scales, ridges, and sharp claws, making them ideal for decorative or collectible dragons. - Produces smooth, high-resolution surfaces
- Better for miniatures or dragons with sharp detail
- Requires post-curing and handling safety
If you’re unsure which method to use, start with FDM. It’s more forgiving and cost-effective, especially for larger models.
Choosing the Right Material
The material you choose will directly affect how your dragon looks, feels, and performs—whether it’s a flexible articulated toy or a detailed display piece. In 3D printing, most hobbyists use plastics, but metal materials are also available for more advanced or industrial needs.
- Plastic Materials (Best for Home and Hobby Use)
Plastic filaments and resins are the most accessible and widely used materials in desktop 3D printing. They are versatile, cost-effective, and compatible with both FDM and resin printers.
- PLA – Easy to print, ideal for decorative and articulated dragons; available in many colors and finishes.
- PETG – More durable and flexible than PLA; good for mechanical parts or functional models.
- ABS – Tough and impact-resistant, but requires controlled temperatures and ventilation.
- TPU – A flexible filament; suitable if you want a soft, bendable dragon (though printing is trickier).
- Standard Resin – Excellent surface detail, perfect for small and display-grade dragons; requires UV post-curing.
- Tough Resin / ABS-like Resin – Offers higher strength and durability; ideal for more robust or intricate resin prints.
These materials are well-suited for anyone printing dragons at home, especially when aesthetics or articulation is the goal.
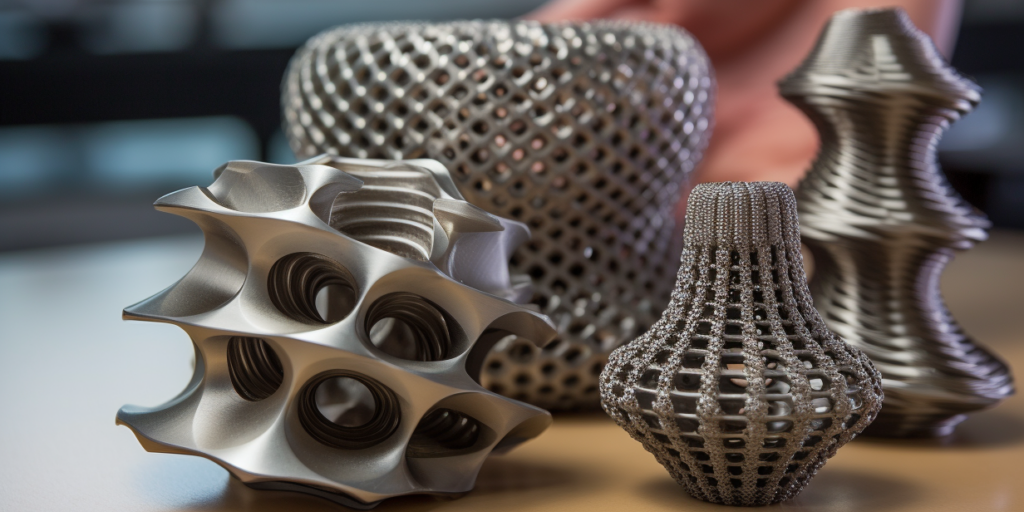
- Metal Materials (For Industrial or Professional Use)
Metal 3D printing is typically used in industrial or engineering contexts. It requires specialized equipment (like SLM or DMLS printers) and is not commonly found in hobbyist setups, but it’s worth mentioning for completeness.
- Stainless Steel – Strong and corrosion-resistant; can be polished for a striking, metallic dragon statue.
- Titanium – Extremely lightweight and durable; ideal for aerospace-grade prototypes or structural dragon-themed components.
- Aluminum – Lightweight with good thermal properties; sometimes used in heat-resistant prototypes or artistic applications.
- Copper & Bronze Alloys – Offer aesthetic appeal for ornamental dragons; used in jewelry or custom sculptures.
While printing a dragon in metal can result in an impressive, lasting artifact, this method is best reserved for industrial-grade projects due to its complexity and cost.
Consider Size, Detail, and Purpose
Before choosing, ask yourself:
- Will this dragon be played with, displayed, or painted?
- Does it need to flex or move (like articulated segments)?
- Is a smooth finish or print speed more important?
Also, check the build volume of your printer—larger dragons may need to be printed in parts, regardless of method.

Image: 3d-printed dragon black with wings
Step 5: Prepare the 3D Printer for Printing
Before hitting “print,” it’s essential to make sure your 3D printer is properly set up. A well-prepared machine minimizes the risk of print failures and ensures your dragon model turns out just as you imagined.
Depending on the printer type: FDM or resin, this setup may include leveling the build plate, loading filament or resin, and checking that your model fits within the print area. It’s also a good time to verify orientation and ensure that your sliced file matches the printer’s settings.
For FDM printers, you’ll want to preheat the nozzle and bed, clean the surface, and apply adhesive aids if necessary (like glue sticks or textured sheets).
Resin users should make sure the vat is filled with clean, well-stirred resin and that the build plate is firmly secured. Even small oversights, like an uneven bed or wrong material temperature, can lead to failed prints, especially for models with intricate wings or fine details.
Pre-Print Checklist:
- The correct filament or resin is loaded
- The model is scaled and oriented properly
- The bed is clean and level
- Nozzle and bed temperatures are preheated
- Adhesion aids (brim, glue, raft) are applied if needed
- Print file matches printer and material settings
- The estimated print time and size are acceptable

Image: red 3d-printed dragon
Step 6. Start the Print Progress
With everything set up, it’s time to begin the most exciting part—printing your dragon. Once you’ve transferred the G-code file to your printer (via SD card, USB, or network), start the print and carefully observe the first few layers.
This initial phase is critical for confirming proper adhesion and spotting any early issues like warping or stringing. If the base layer sticks well and prints cleanly, you can usually let the printer continue on its own.
How Long Will It Take?
3D printing is not a fast process, especially when you’re creating a detailed model like a dragon. The total print time depends on several factors:
- Size of the model
- Layer height (detail level)
- Material used
- Printer speed settings
For example, an articulated dragon that’s about 30 cm long, printed in PLA at 0.2 mm layer height, may take anywhere from 10 to 18 hours on a standard desktop FDM printer. A smaller dragon figure printed in resin could still require 6 to 10 hours, including base layers and supports.
Large or highly detailed dragons may need to be printed in multiple parts or overnight. Be sure your printer is in a safe and well-ventilated location if left unattended for long prints.
Printing in Batches
If you’re producing multiple dragons—perhaps for a tabletop campaign, a classroom, or a small shop, you might consider printing in batches. While some hobbyists set up multiple prints sequentially on the same machine, larger-scale needs are better served through batch production.
In such cases, using an online 3D printing service can be a time-saving option. Services like Xmake can handle batch production efficiently, with industrial-grade machines that deliver consistent quality at scale. You simply upload your STL file, specify materials and quantity, and receive the completed parts without the hassle of repeated setup and monitoring.

Image: powerful 3d-printed dragon
Step 7: Remove the 3D Printed Dragon
Once the printing process is complete, it’s time to carefully remove your dragon model from the build platform. While this step may seem straightforward, improper removal can damage either the model or the printer’s surface, especially when dealing with delicate wings, claws, or articulated segments.
For FDM prints, allow the bed and model to cool down first. As the material contracts, it naturally loosens its grip on the build plate. Use a thin, flat tool like a spatula or print removal blade to gently lift the dragon from the surface, working slowly to avoid snapping off small features. If you’re using a flexible build plate, simply remove and bend it slightly to pop the print free.
For resin prints, you’ll need to detach the model from the metal build platform using a scraper. Be careful not to gouge the surface or crack the model. After removal, rinse the dragon in isopropyl alcohol to clean off any uncured resin, then proceed with post-curing under UV light if required.
Take extra care when handling fragile or articulated designs, especially if supports are still attached. It’s best to remove supports only after the model is fully detached and cooled or cured.
Order a 3D Printed Dragon Online

Not everyone has access to a 3D printer, or the time and tools needed to handle all the steps from model preparation to post-processing. Fortunately, there’s an easier option: ordering your 3D printed dragon online.
Some trusted platforms allow you to upload your model file (usually in STL format), select material and finishing options, and receive a high-quality dragon delivered to your door. These services are ideal for those who want professional-grade results, large-format prints, or complex materials like nylon, carbon-fiber blends, or metal.
We are a reliable platform for 3d printing services:
- Xmake – Ideal for custom dragon models, batch production, or industrial-grade materials like stainless steel or titanium. Upload your file, get an instant quote, and rely on expert support throughout the process.
When uploading your dragon model, remember to double-check scale, wall thickness, and overhangs to ensure a successful print. Some platforms even offer model checks or printability analysis before production.
Online services are especially useful if you’re planning multiple dragons for display, gifts, or tabletop gaming. They save time, eliminate the need for equipment, and can offer finishes far beyond what a typical desktop printer can produce.
Conclusion
Creating a 3D printed dragon is a rewarding process that blends creativity with modern manufacturing technology. From selecting the right model to fine-tuning materials and settings, each step contributes to the final creature taking shape, layer by layer.
Whether you print at home or use an online service, the result is a unique, customized piece that showcases both your imagination and technical skill.
FAQs about 3D Printed Dragons
1. How long does it take to 3D print a dragon?
Print time depends on the size, complexity, material, and printer settings. A small FDM dragon (10–15 cm) may take 6–12 hours, while a detailed resin dragon or larger model can take 20 hours or more.
2. Can I paint a 3D printed dragon?
Yes, absolutely. Both FDM and resin prints can be painted after post-processing. Priming first ensures better adhesion, and acrylic paints are commonly used for both brushwork and airbrushing.
3. What’s the best material to print a dragon with?
For beginners, PLA is easy to work with and affordable. For finer details, resin is ideal. For functional or collectible pieces, advanced materials like PETG, ABS, or even metal can be used, depending on your needs and budget.
4. Can I print articulated or movable dragon models?
Yes, articulated dragons, like those with segmented tails or flexible wings, are popular and widely available. Just search for terms like “articulated dragon STL” on model sites. Be sure your printer’s tolerances can handle the movable joints.