Forget air pumps and flat balls – 3D printing is changing how we think about basketballs. With the right tools and a bit of creativity, you can design and manufacture your very own airless basketball at home. Whether you’re a maker, designer, or just curious about functional sports gear, this project blends engineering with personal expression in a way that’s both practical and fun.
In this guide, you’ll learn:
- What makes an airless basketball unique
- How to design or find a printable model that fits your vision
- Step-by-step instructions for slicing, printing, and testing your DIY basketball
What Is an Airless Basketball?
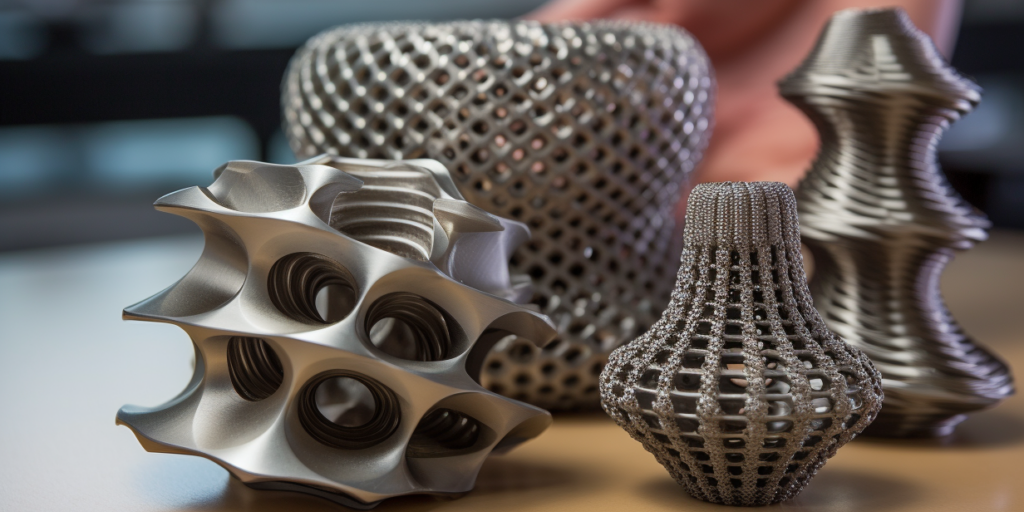
An airless basketball is a specially designed ball that requires no internal air pressure to maintain its shape or bounce. Unlike traditional basketballs that rely on an inflatable bladder and rubber casing, airless versions use a lattice-like internal structure to provide resilience, energy return, and consistent shape retention. The concept has gained attention in recent years thanks to prototypes like the Wilson Airless Gen1, which showcased the potential of 3D printed sports equipment.

Image: Wilson Airless Gen1
These basketballs are typically manufactured using advanced 3D printing methods and flexible materials such as TPU (thermoplastic polyurethane). The outer surface can be customized in both structure and texture to achieve different grip profiles, visual designs, or tactile feedback.
Common texture and design variations include:
- Hexagonal or honeycomb lattices for even energy distribution
- Perforated spiral structures to reduce weight and improve flexibility
- Raised panel-style textures that mimic the look and grip of traditional basketballs
- Smooth, matte surfaces for a minimalist aesthetic
- Custom logo or graphic embossing for branding or personalization
While not yet certified for competitive play, airless basketballs are ideal for indoor practice, product development, engineering education, or as display pieces that demonstrate the power of digital fabrication.
Step 1: Choose or Design a Unique 3D Model
The first step in creating your airless basketball is selecting a digital 3D model. You generally have two options:
- Download a ready-made design from an online repository
- Create your own custom model using CAD software.
For most DIYers, especially those new to 3D modeling, starting with a pre-designed file is the more practical and time-efficient route.

Image: Airless Basketball Realistic 3D Model
There are several free and paid platforms where you can find 3D printable airless basketball models, including:
- Thingiverse – Offers a variety of open-source airless ball designs created by hobbyists and engineers
- Printables (by Prusa) – Known for high-quality, community-tested files
- Cults3D or CGTrader – Useful for paid, professionally-designed lattice models
When choosing a model, look for versions labeled as “print-ready” and those optimized for flexible filament printing. Ensure the file format is STL or 3MF, and check for key attributes like uniform lattice structure, symmetrical design, and clear part dimensions.
Customizing an existing model is also an option—such as adding a logo, resizing the diameter, or altering surface textures. Tools like Meshmixer, Blender, or Fusion 360 allow for these modifications without building a model from scratch.
Step 2: Prepare the STL File
Once you’ve chosen or downloaded your airless basketball model, the next step is to ensure the STL (or 3MF) file is properly prepared for slicing and printing. Even well-designed models may contain geometry issues that need fixing, especially when dealing with complex lattice structures.
Before slicing, it’s important to check the following:
- Watertight geometry – The model should be a closed, manifold mesh with no holes or non-manifold edges
- Wall thickness – Thin lattice struts must meet the minimum printability threshold for your selected material and nozzle size (e.g., >0.8 mm for TPU with a 0.4 mm nozzle)
- Mesh resolution – Ensure the file isn’t over-tessellated, which can slow slicing, nor under-detailed, which can degrade structural accuracy
- File orientation – Some models may need to be rotated upright to print optimally with fewer supports
Recommended tools for checking and repairing STL files include:
- Meshmixer – For visual inspection, healing, and editing parts of the mesh
- Microsoft 3D Builder – Simple auto-repair feature for watertightness
- Netfabb (free via Fusion 360) – For advanced analysis and automatic repair workflows
If your file format is 3MF, it may already contain metadata such as color, material presets, or part labeling, which can streamline the slicing process. However, STL remains the most widely used and universally compatible format for most slicing software.
Properly preparing your file at this stage ensures a smoother workflow later and reduces the risk of print failure or structural inconsistency.

Image: Wilson Airless Basketball Prototype
Step 3: Slice Your Airless Basketball Model for Printing
With your STL file ready, the next step is to import it into a slicing software. This is where your digital model gets translated into printer instructions – layer by layer – through G-code. Popular slicers like Cura, PrusaSlicer, or Bambu Studio all work well, especially if you’re using an FDM printer.
For an airless basketball, slicing settings play a crucial role in both the look and performance of the final print. Since the ball’s structure is typically lattice-based or porous, infill settings may be irrelevant or even disabled depending on the model’s design.
Here are a few key slicing tips to keep in mind:
- Layer Height: Use 0.2 mm for a good balance of detail and speed; go finer for smoother surfaces
- Wall/Perimeter Settings: Increase the number of walls (3–4) to strengthen thin lattice elements
- Print Speed: Reduce speed (e.g., 20–30 mm/s) for flexible filaments like TPU to avoid skipping or deformation
- Cooling: Moderate cooling helps maintain overhang quality but avoid excessive airflow with soft materials
- Supports: Many models are designed to be support-free, but check preview mode to confirm; if needed, use tree supports or custom block settings
Once everything looks good in preview mode, save your G-code to an SD card or transfer it wirelessly to your printer. At this point, you’re nearly ready to bring your airless basketball to life.

Image: Airless Basketball v1 by 3dxav
Step 4: Choose the Right Material and Method
The performance of your 3D printed airless basketball depends heavily on the material and printing method you choose. Because this type of ball relies on structural elasticity rather than internal air pressure, the material must be durable, flexible, and resilient enough to absorb impact and return energy effectively.
For most DIY setups, FDM (Fused Deposition Modeling) is the go-to printing method due to its accessibility and affordability. However, for advanced users or professional-grade results, SLS (Selective Laser Sintering) or MJF (Multi Jet Fusion) can deliver superior strength and precision, especially for complex lattice patterns.
Recommended materials include:
- TPU (Thermoplastic Polyurethane) – The best choice for flexibility and bounce; Shore hardness between 85A and 98A is ideal
- TPE (Thermoplastic Elastomer) – Slightly softer than TPU but still usable for prototyping
- Nylon (via SLS/MJF) – Offers strong yet flexible characteristics, suitable for more demanding or aesthetic builds
- Flexible PLA – Easier to print than TPU but less elastic; best used for static models or experimentation
If you’re working with TPU on an FDM printer, consider the following:
- Use a direct drive extruder for better filament control
- Print at slower speeds (20–30 mm/s)
- Keep retraction minimal to avoid filament grinding or jams
For those who don’t have a printer optimized for flexible materials, you can still design your model and outsource production through online services that offer industrial-grade elastomers and advanced print resolution.
Choosing the right material and method not only ensures a successful print but also allows your airless basketball to perform reliably and feel satisfying to handle.

Image: Wilson Airless Basketball
Step 5: Prepare Your 3D Printer
Before you begin, level the bed, clean the nozzle, and load your filament, preferably TPU for its flexibility. A direct drive extruder works best, but slower speeds (20 – 30 mm/s) can make even Bowden setups viable. Set the nozzle to 220 – 240°C, bed to 40 – 60°C, and keep retraction minimal.
Start with a small test print if needed, then launch your basketball model. Monitor the first few layers closely to catch any adhesion issues early. Depending on the structure, the full print may take several hours. Let it run uninterrupted for the best results.
Step 6: Post-Processing and Finishing
Once the print is complete, let it cool fully before removing it from the bed to avoid warping or tearing soft lattice elements. If your model used support structures, remove them carefully. Flexible filaments can stretch or tear under stress.
For a cleaner finish, you can lightly trim stringing or blobs with a hobby knife or scissors. If needed, light sanding helps smooth rough spots, but be gentle to preserve the ball’s flexibility. You can also customize the surface with paint, decals, or rubber coatings to improve grip or give it a unique look.
Post-processing is where your DIY project becomes personal – feel free to experiment with finishes that match your style or use case.
Step 7: Test Your Custom Airless Basketball
Now comes the fun part, seeing how your DIY airless basketball performs. While it won’t behave exactly like a regulation ball, a well-printed model should still offer decent bounce, shape retention, and structural resilience. The goal is to evaluate whether your design works as intended, and to identify areas for improvement.
Here are some simple but effective tests you can run:
- Bounce Test: Drop the ball from shoulder height onto a hard surface (like a tile or wooden floor). A good result is a consistent rebound that’s roughly 50–70% of the drop height, depending on material elasticity.
- Compression Test: Press the ball between your hands or under a moderate weight. It should compress slightly and recover its shape without deforming or cracking.
- Roll Test: Roll the ball across a smooth floor. If it wobbles or veers, the model may be asymmetrical or have uneven mass distribution.
- Grip and Texture Test: Handle the surface with both dry and slightly moist hands. Check if the texture provides reasonable grip or if surface treatments (like rubber spray or paint) are needed.
- Impact Durability: Gently throw the ball against a wall or bounce it on pavement to assess wear resistance, especially if you used softer filaments.
You can also compare different versions by changing infill patterns, lattice thickness, or materials to see how each affects bounce, flexibility, and durability.
Testing isn’t just about checking functionality; it’s also an opportunity to learn and refine. One of the best parts of DIY 3D printing is that you can iterate as much as you like.
Use Online 3D Printing Services

If your home 3D printer isn’t equipped for flexible materials, or you simply want a more professional finish, you can outsource your model through an online 3D printing service. This is especially useful if you’re printing with advanced materials or need a cleaner, more durable result.
Xmake offers a convenient online 3D printing service that supports a wide range of technologies, including FDM, SLA, SLS, and more. For most DIY airless basketballs, FDM printing with TPU is a practical and cost-effective option. At Xmake, there’s no minimum order requirement; you can print just one prototype or test version without commitment.
The process is simple:
- Upload your STL file directly to the platform
- Choose your preferred material, color, and print method
- Instantly receive a quote and lead time
- Confirm your order and wait for delivery
- Customer service will contact you for the final smooth delivery
Xmake’s service is ideal if you don’t have access to flexible filament, need higher print precision, or want to experiment with alternative materials like nylon or industrial-grade TPU. It’s a great way to scale your DIY project or share it with others without needing a full workshop.
Conclusion
Creating a 3D printed airless basketball is a rewarding DIY project that blends creativity with functional design. Whether you’re printing at home or using a service like Xmake, the process offers flexibility, innovation, and a hands-on look at how modern manufacturing is reshaping everyday objects.
FAQs about 3D Printed Airless Basketball
1. What’s the point of an airless basketball?
An airless basketball eliminates the need for inflation and avoids issues like deflation, inconsistent bounce, or punctures. It’s also a showcase of how structural design, rather than internal pressure, can deliver performance, making it ideal for prototyping, experimentation, and showcasing engineering innovation.
2. Will the NBA use airless balls?
Currently, no. While the NBA has acknowledged experimental airless prototypes like the Wilson Airless Gen1, these are not approved for official gameplay. The primary barriers are bounce consistency, weight regulation, and player feedback. However, such designs may influence future training or tech-driven formats.
3. Can I actually play basketball with a 3D printed airless ball?
Yes, to an extent. If printed with flexible materials and designed properly, the ball can handle recreational use. However, it won’t fully replicate the performance of a regulation ball in terms of weight, grip, or bounce.
4. What printer and material should I use?
A standard FDM printer with a direct drive extruder is ideal, paired with TPU filament for flexibility. If your printer isn’t compatible, services like Xmake can print it professionally with the right materials and settings.
5. Where can I find a 3D model to get started?
Free models are available on platforms like Thingiverse, Printables, or Cults3D. Look for designs labeled as “airless basketball” or “lattice ball,” and be sure they are marked as printable with flexible filament.